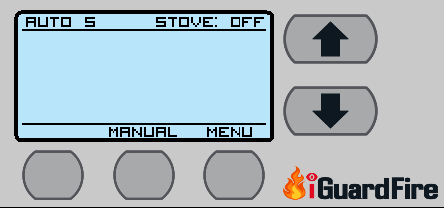
Main Screen
This is the Main Screen while in sleep mode. The top portions shows the Auto Shut Off time set at AUTO 5, and the Stove is off. The bottom part shows Manual button in the middle and Menu button on the right. Manual will allow you to enter into the timer to set the Manual Timer.
The Menu button will access all the settings listed below in this helpful list. Use the Up/Down arrows to to scroll and use Select to enter into that option.
The left button is situational and will read a number of things like; Cancel, Reset, Stop or whatever the situation requires.
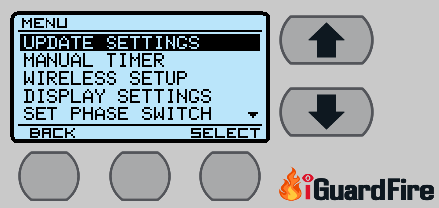
Update Settings
Once changes are made to the Internet settings, the iGuardStove may require that you pull the updates to the device.
This is accomplished by selecting “Update Settings”.
After it is confirmed that the update is finished you can back out by using the “Back” button.
Display Settings
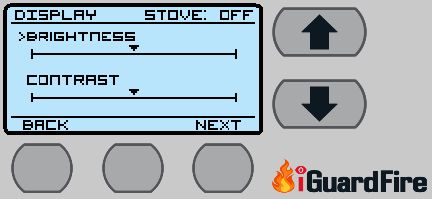
This setting will allow you to change the brightness and contrast of the display screen so you can see it better.
Press “Select” to enter this option.
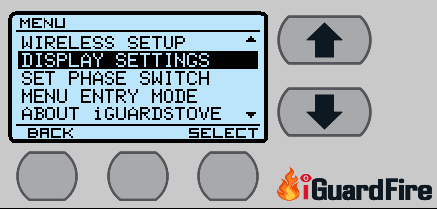
Highlight either Brightness or Contrast and use the Up/Down arrows to adjust.
After you have the screen to your liking, use the “Back” button to return to the Main Screen display settings.
Manual Timer
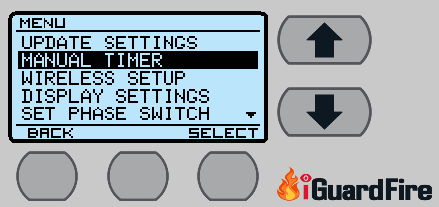
This option allows the user to access the Manual Timer locally while at the iGuard when the online account has the Manual Timer hidden. This simply activates the timer for you and saves you from having to enter the online account to make it visible. Accessing it here still does not make it visible to other users.
To prevent others from activating the Manual Timer using this method you should engage the Menu Lock explained further in this list
This is different from the Manual Timer customization settings found further in this list.
Timer Settings
NOTE: This option will only appear if the iGuard has NEVER been connected to Wi-Fi. If you do not see the option, but want this ability you must reset the devices Factory Defaults. Keep in kind when you do this you lose the Wi-Fi connection and those features.
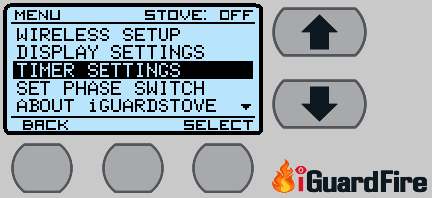
This allows you to change the default times for both the Auto Shut Off Timer and the Manual Timer.
While inside Menu use the Up Down buttons to scroll down to “Timer Settings” and hit “Select”.
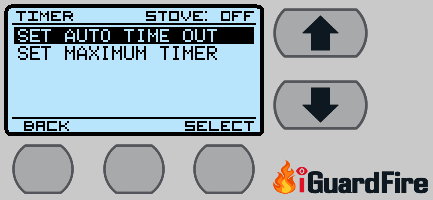
There are two choices
- Auto Shut Off – This adjusts the length of time before the Auto Shut Off
- Maximum Timer – Sets the maximum amount of time the Manual Timer can be set to.
Choose and then press “Select“.
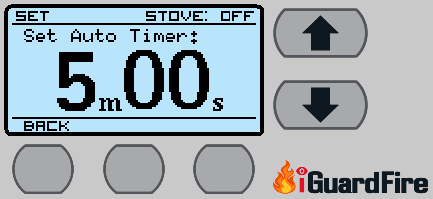
1 Auto Shut Off: This can be set between 1 and 15 minutes. The default is 5 minutes and its recommended that it be left at that. Every time motion is seen the timer will keep resetting to 5 minutes so if they are being attentive it will run longer than 5 minutes. It’s only when they are gone for the full 5 minutes that it will get a chance to time out and shut off. Keep in mind a LOT can happen even in 5 minutes. Adjust it and then press “Back” to save.
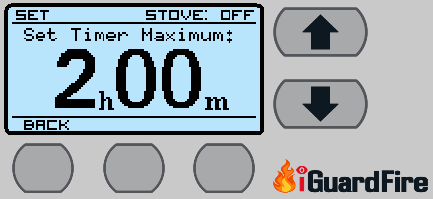
2 Maximum Timer: When you activate the Manual Timer you can only go as high as 2 hours maximum. If you need more time then this is how you adjust it. Adjust it and then press “Back” to save.
Reminder Alerts
You can choose to have an Alert Reminder beep before the iGuard will shut off the stove.
Go to “Alert Settings”. Choose “Select” to toggle the audio alert between on and off. The factory default is Off.
Other than off your iGuardStove is adjustable between 3 to 60 seconds.
Menu Lock – (* Requires firmware v2166 or higher. Call us for a free update.)
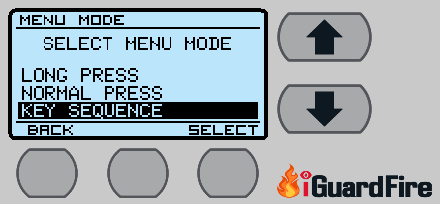
There are 3 ways to access the Menu on the iGuardStove ranging from very simple to password protected
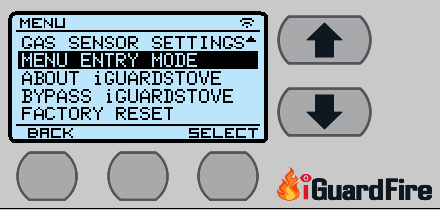
To select them press and hold the “Menu” button for 2 seconds and when the menu opens scroll down to “Menu Entry Mode” and press “Select”.
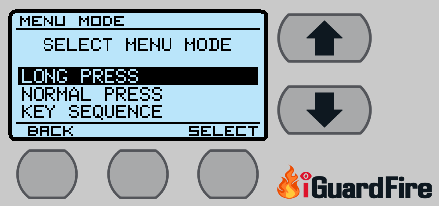
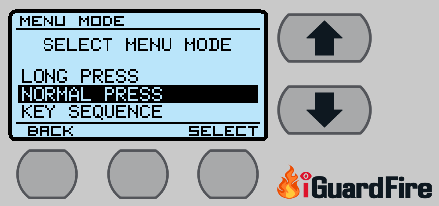
- First press and hold the Menu button and the screen will say Menu Locked.
- Then press the Middle Button,
- Then the Up Arrow and
- Then the Left Button and at that point the Menu will open.
Gas Sensors – (Gas iGuardStoves Only)
There is an Upper and Lower gas sensor and they can be disabled using this option.
Highlight “Gas Sensors” and press “Select“.
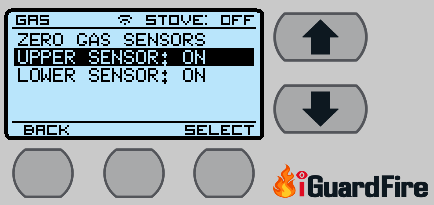
Using the Up/Down arrows highlight with sensor and press “Select”. That will toggle that sensor on and then off. If you press it again to back on again.
The reason you may want to disable the sensor is up to you. Maybe you find they are providing false alerts or you just don’t need them but this is how you disable them. Call us if you think they need fine tuning.

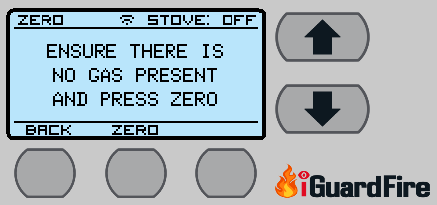
Zeroing Option. If you think the sensors are not accurate you can use this feature to tell the sensors that whatever they are sniffing right now is normal and to not alert you. Simply highlight “Zero Gas Sensors” and press “Select”
Set Phase Switch
The iGuardStove controls the stove by turning the power on and off. There are 2 power phases that are controlled by the relays. One of the relays will also power the stoves clock. If the iGuardStove turns off the stove and the clock goes out then you need to choose the opposite phase found in this setting.
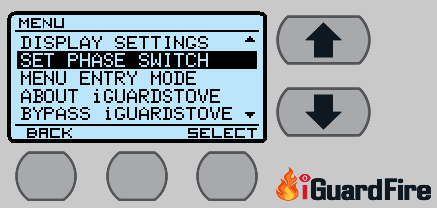
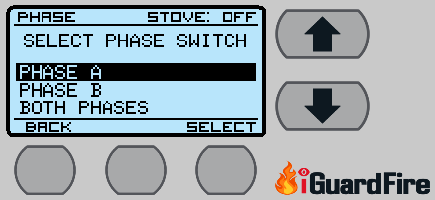
Your options will be either Phase A, Phase B or Both Phases. Use “Select” to enter this area and after making your selection use the “Back” button to return to the Main Screen.
If you have a small 120 volt utility outlet on the stove and want that to go out as well then choose “Both Phases”. Keep in mind this setting will also cause the clock to go out.
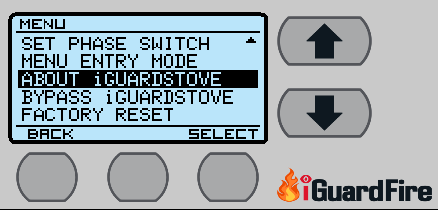
About iGuardStove
Use “Select” to enter this option
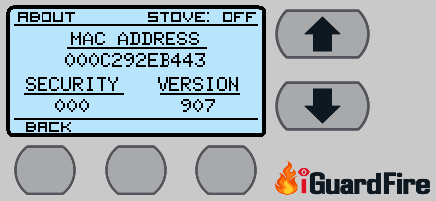
The information on this screen will tell you about the MAC address of the control panel including the version of the firmware that is installed.
After making your selection use the “Back” button to return to the Main Screen
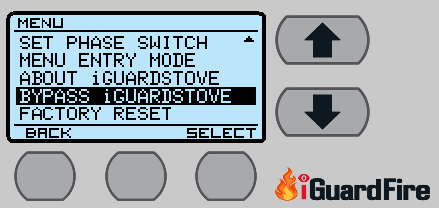
Bypass iGuardStove
Using the Bypass iGuardStove will turn the iGuardStove system off and there will be NO protection. There may be an instance where this may be necessary and if used do not forget to enable the iGuardStove afterwards.
Press “Select” to enter this area and after making your selection use the “Back” button to return to the Main Screen.
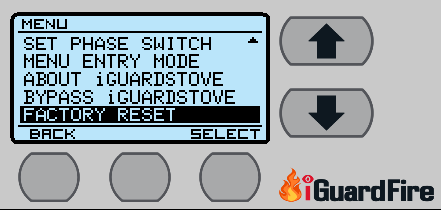
Factory Reset
Using the Factory Reset will restore all original settings. Once you have connected the iGuardStove to the Wi-Fi then many settings that were accessible buy the control panel will no longer be available. These settings will only be accessible using your online account. Using the Factory Reset will also wipe out your Wi-Fi connection. Be careful when choosing this option.
